
Making music from your bedroom is more than just a hobby—it’s a commitment. You spend hours mixing, tweaking synths, laying down vocals, and dialing in drums. But if your space isn’t soundproofed properly, all that effort can go to waste. Your mixes may sound off, your vocals might pick up echo or background noise, and let’s be honest—your neighbors might be silently (or not-so-silently) resenting you.
Let’s get real: you don’t need a commercial-grade studio to make great music, but you do need a room that doesn’t fight against your sound. The good news? You don’t have to tear down walls or spend a fortune. The best soundproofing solutions for bedroom producers are surprisingly achievable with the right approach—and that’s exactly what this article will walk you through.
Key Highlights
- Soundproofing is critical for isolation and cleaner recordings.
- Doors and windows are the first sound leak points to fix.
- Foam panels, bass traps, and carpets drastically reduce reflections.
- Portable vocal booths and filters can work wonders for vocals.
- Room layout and speaker placement matter more than gear.
- Even DIY treatments offer solid acoustic benefits.
Why You Need to Soundproof—Even If You’re Just Starting Out
Let’s start with the “why.” Maybe you’re recording vocals at 11 PM. Or maybe your studio monitors are thumping while your roommate is trying to sleep. Either way, if you’re not isolating your space properly, two things will happen: you’ll bother the people around you and you’ll be mixing in an environment that lies to your ears.
Think about it—your room has a sound of its own. Soundwaves reflect off walls, ceilings, and hard surfaces, bouncing around and creating what’s called “room coloration.” It makes your low-end boomier than it actually is. It makes high frequencies sound harsher. It adds fake reverb where you don’t want it. And the result? You start adjusting your track to compensate for the room—not for how it actually sounds.
When your space is untreated, you’re producing with a handicap. Proper soundproofing and treatment bring your space to a more neutral place so that what you hear is what’s really happening.
1. Start With the Fundamentals: Block the Leaks
You could install the most expensive acoustic panels money can buy—but if your door has a one-inch gap under it, you’re losing the fight.
That’s why I always tell fellow bedroom producers to begin with the basics:
- Seal your doors: Use weatherstripping foam or rubber seals to close any gaps around the frame.
- Door sweeps: Install one at the bottom of your door to block airflow (and sound).
- Curtains for windows: Blackout curtains or even moving blankets can absorb a surprising amount of high-frequency noise from outside.
These aren’t glamorous fixes, but they make a real difference, especially when you’re working in a rented room or apartment. You don’t have to build a floating room within a room—you just need to plug the obvious holes first.
2. Don’t Get Fooled by the Term “Soundproof Foam”
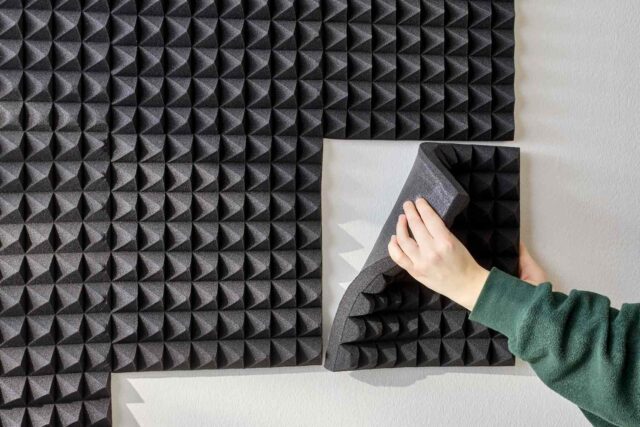
Let’s clear something up: acoustic foam doesn’t “soundproof” your room. That term gets tossed around too loosely. Foam panels are for treatment, not isolation. What they do is absorb echoes and reflections that make your recordings sound sloppy and uncontrolled.
For bedroom producers, these panels work best when placed where sound reflects most:
- On either side of your listening position
- Behind your speakers
- Behind and slightly above your desk setup
- On the back wall behind you
By reducing slapback echo and flutter, you’ll get tighter-sounding vocals and a mix environment that’s easier on your ears. But don’t overdo it. A common mistake is turning your room into a foam-padded cave. Leave some surfaces untreated or use diffusers to balance it out. You want clarity, not dead silence.
3. Add Bass Traps to Tame the Low-End
If you’ve ever struggled with a muddy kick or booming bassline, chances are it’s not your mix—it’s your room. Low-end frequencies are the hardest to control because they travel further and build up in corners.
That’s where bass traps come in. These thick, dense panels are designed to absorb low frequencies. They’re usually placed in the vertical corners of your room, but horizontal ceiling-to-wall corners work too if space is tight.
Trust me, the moment you install proper bass trapping, your low end will tighten up instantly. Kicks hit cleaner. Subs feel less cloudy. And best of all—you stop second-guessing your mix decisions.
4. Rugs, Carpets, and What’s Under Your Feet Actually Matters

Hardwood floors and tile might look nice, but they’re acoustic nightmares. Every sound that hits the floor bounces right back up at you, adding unwanted brightness and echo.
The fix? A thick area rug under your setup. If you can layer it on top of a rug pad or dense foam, even better. Not only will this reduce reflections from below, but it will also create a warmer overall sound in the room. Plus, your feet will thank you during those long mixing sessions.
It may seem like a minor detail, but you’ll hear the improvement—and if you’re recording vocals, your mic will catch less room noise too.
5. DIY Vocal Booth Hacks That Actually Work
You don’t need a $500 reflection filter to get clean vocals. There are several low-cost hacks that can do the trick just fine:
- Closet recording: Hang clothes around the mic to absorb sound.
- PVC frame booths: Build a box with PVC pipes and hang blankets around it.
- Mattress wall: No joke—leaning a mattress behind the vocalist actually absorbs a ton of sound.
If you’ve got a bit of budget to spare, a reflection filter combined with a treated room makes for excellent takes. But don’t underestimate the power of a few blankets and some creativity.
6. Isolate Your Monitors—Because the Desk Isn’t Your Friend
Your speakers vibrate. If they’re sitting flat on your desk, they’re not just producing sound into the air—they’re transmitting it into the desk, which can cause low-end smearing and midrange mud.
The solution? Monitor isolation pads. These foam risers lift your speakers off the desk and absorb those vibrations. It’s a small investment, but one of the most cost-effective upgrades you can make to your setup. Your stereo image will feel wider. Your bass will be clearer. It’s an easy win.
Many producers are building their brand online—whether it’s releasing songs, writing blog posts, or creating content about their process. If you’re using any automation tools or assistance in that process, it’s smart to make sure your content passes originality tests. Tools like an AI checker can help you keep your written work genuine and avoid sounding overly robotic. This matters especially if you’re building an audience or applying for sync placements where authenticity counts.
What to Skip When Treating Your Room
Let’s talk myths and money-wasters:
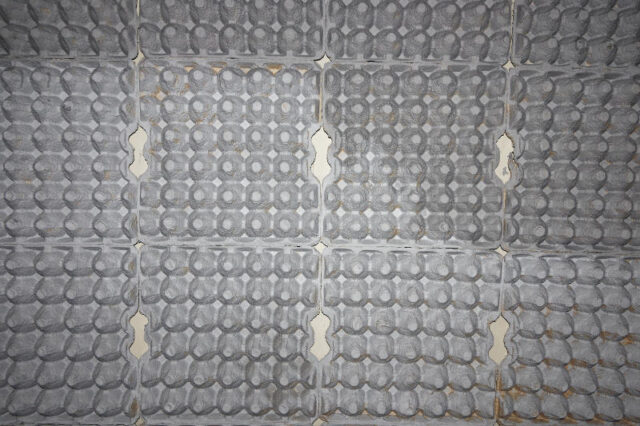
- Egg cartons don’t work: They don’t absorb sound; they just collect dust.
- Cheap foam kits: Many budget bundles are more cosmetic than functional. Stick to thicker foam (2″ or more).
- Tiling every wall: You don’t want to kill the room completely. Always balance with some live areas or diffusion.
- Ignoring the ceiling: It reflects sound just like walls. Treating it can be a game changer if you record vocals.
Make decisions based on how your room sounds—not how it looks on Instagram.
Final Thoughts: Evolve With Your Space
Every bedroom producer starts somewhere. You might begin with a rug, a few foam squares, and a rolled-up towel under the door. That’s fine. What matters is that you start listening to your room. Hear how it changes when you treat it. Learn how different surfaces affect your sound.
The best soundproofing strategy is one that grows with your needs. As your skills improve, your ears will become more sensitive to the flaws in your space. That’s a good thing. It means you’re getting better.
So don’t rush. Add treatments step by step. Learn what works. And before you know it, your bedroom will start sounding a whole lot more like a proper studio—without a construction crew or a huge budget.


